
Here we are, on the cusp of winter: the season is (mostly) over for living history events, the days are short, and what is there to do but pine until the season starts again? Chores, gentle reader: chores.
Before you pack your kit away for the season, or even if you never do, there are some tasks you can undertake to make it better. You don’t need a major overhaul to improve your experience, just some simple maintenance. (These tips are applicable in pretty much every time period.)

Nasty, right? This is why you wash your apron!
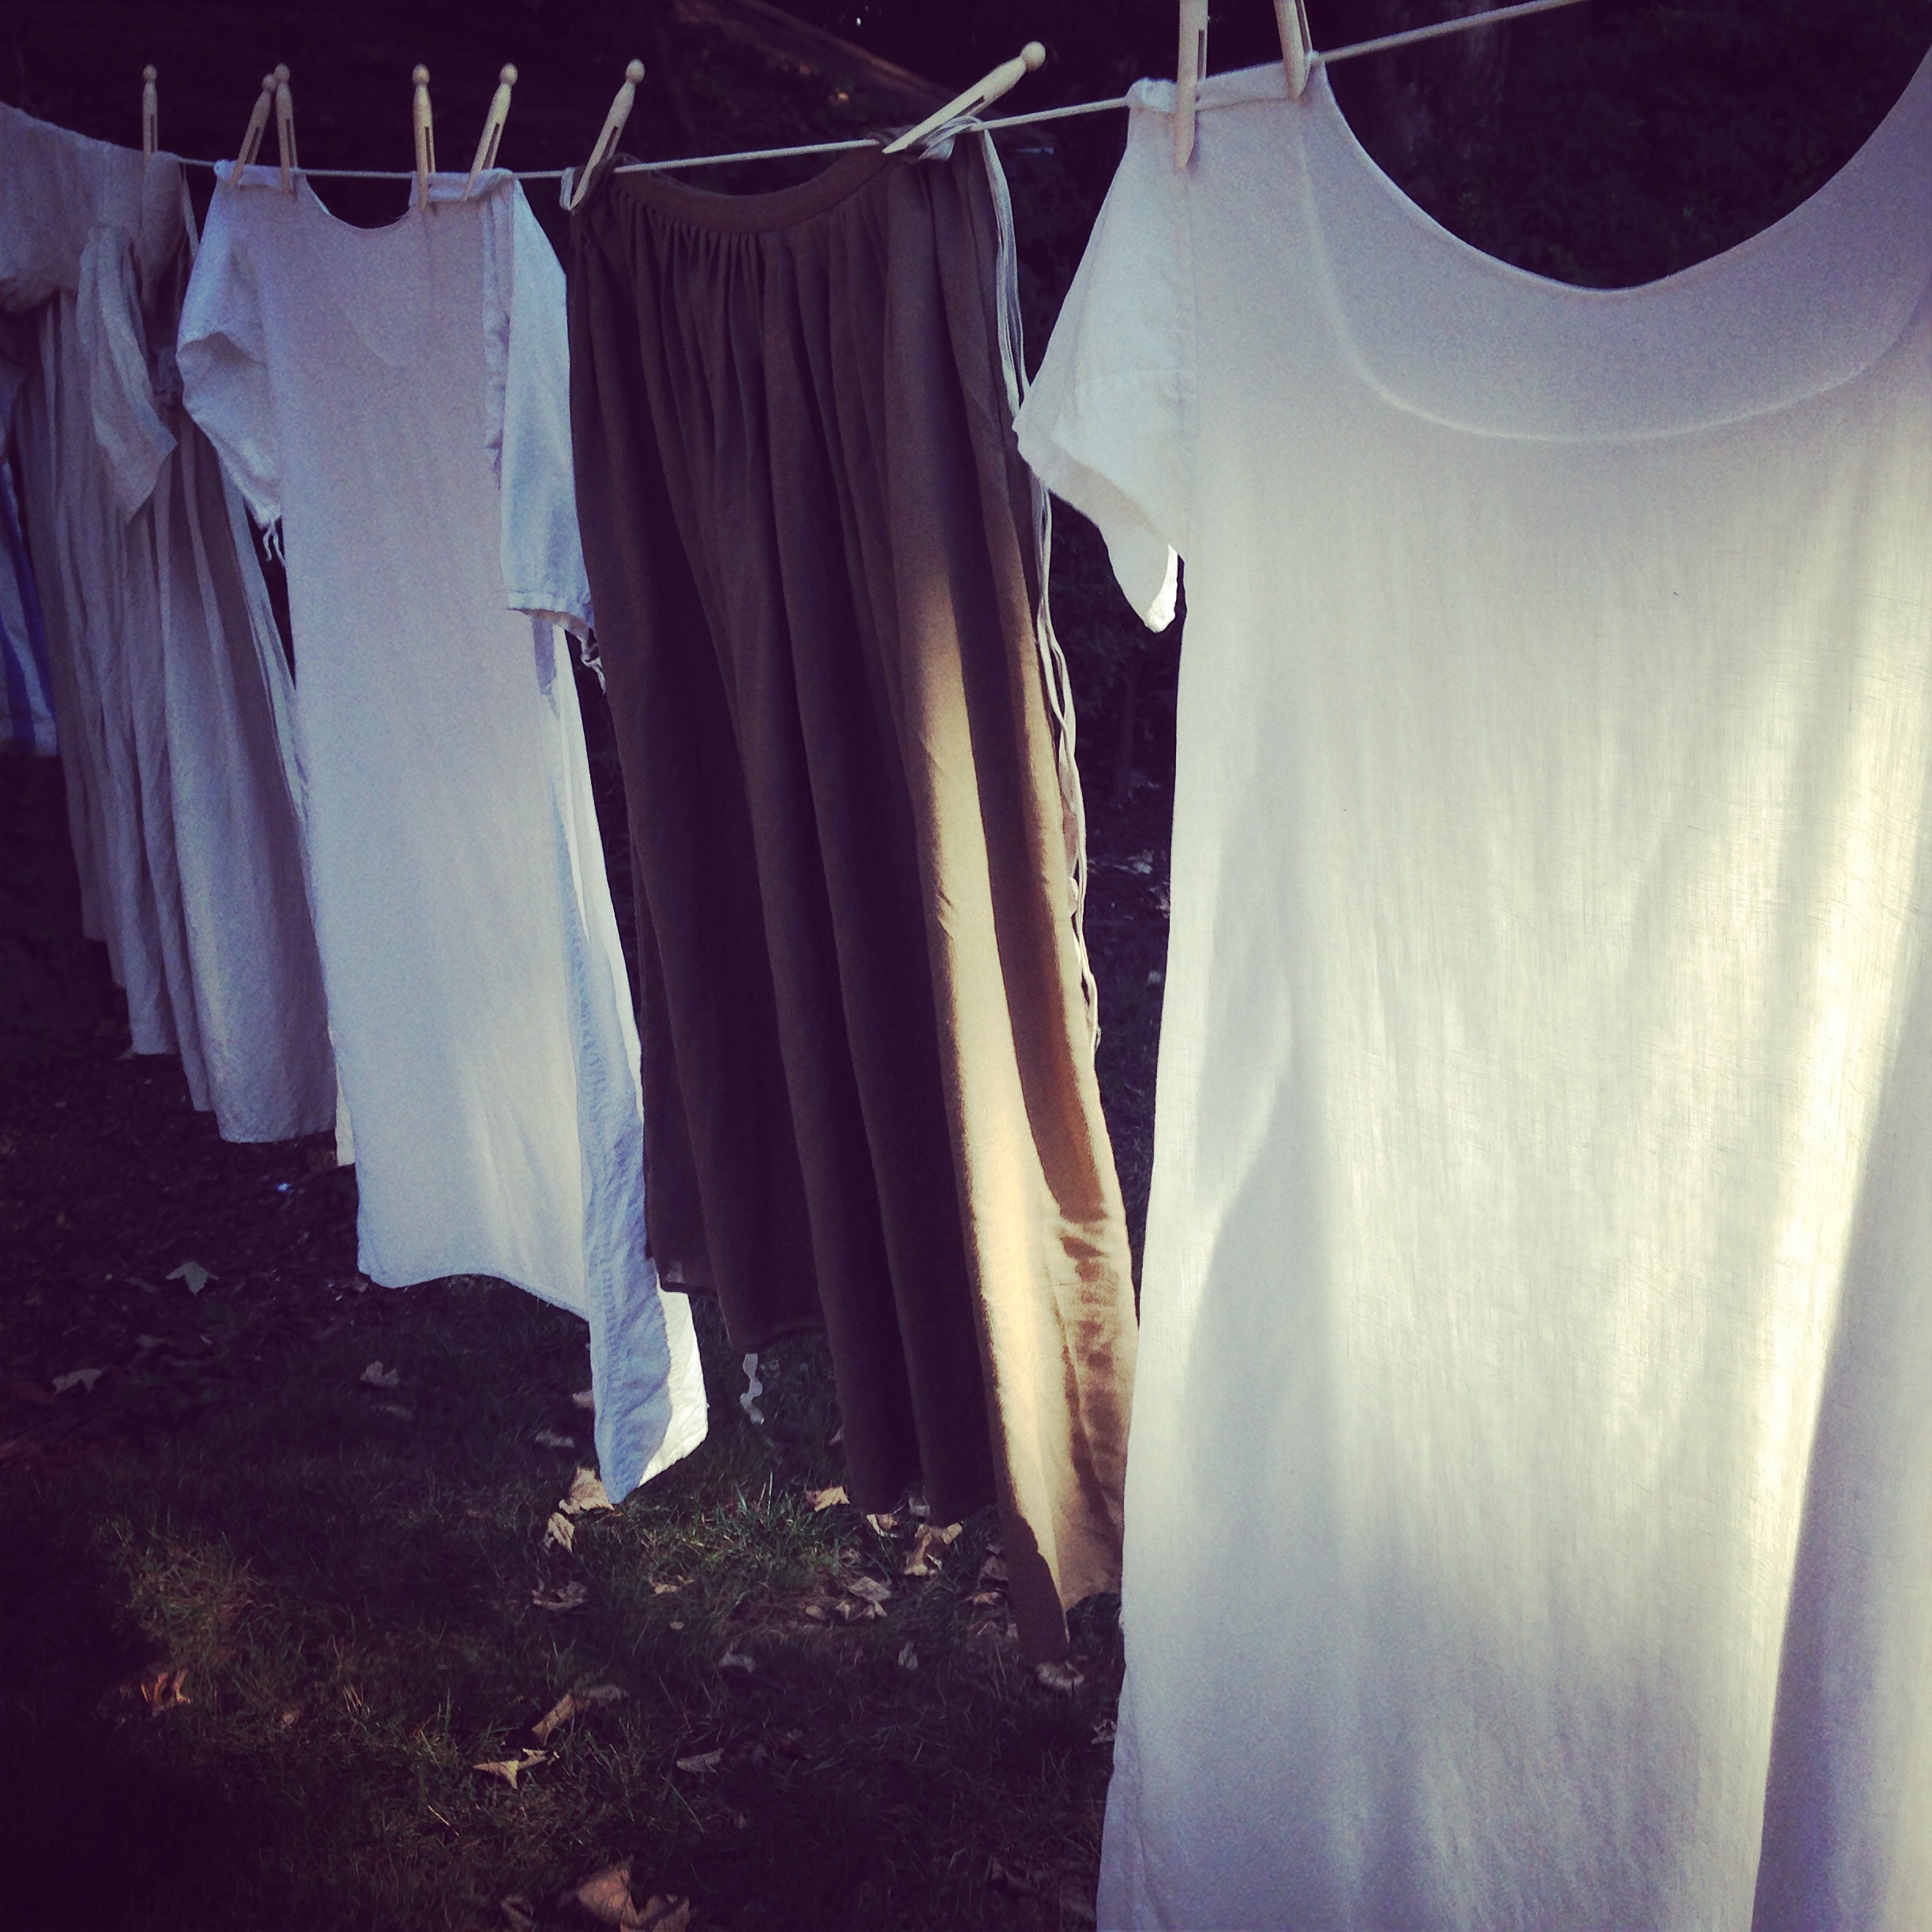
Wash your body linen. Please. Shirts, shifts, neck handkerchiefs, rollers: wash them. And your caps! They washed them, and so can you. I prefer to wash before I mend, but I hand wash my linens. We have a large kitchen sink that I can plug, so I fill it with hot water and wash my aprons, shifts, and stockings with lye soap. (I like that it does not smell like modern detergents; Drunk Tailor bought a lot of it for making white ball so we might as well use it.) Whenever possible, I hang my clothes to dry outside, preferably on a sunny day. You may also choose to spread your things out on the grass (if you have it); this helps whiten linens. We lack grass, or a clothesline, in our yard so it’s hangers in the trees or on the shower curtain rod for me. There’s no shame in that– it’s just not as picturesque. If you want to know more about laundry, Madam Johnson obliges.
Wash your stockings. Your feet will thank you. These are another handwash item; if you have wool stockings (I recommend Sally Pointer if you can get in the order window), handwashing is essential. Again, I use the kitchen sink, lukewarm water, and lye soap. Madam Johnson does not recommend using soap on worsted stockings, and she has a point: too much soap, heat, and agitation will felt your stockings. To dry, put down a towel, and reshape the stockings in the center of the towel. You may need to make sure the back seam is centered, and the feet correctly shaped. Fold in the edges of the towel and roll it. This will safely squeeze out the water. Dry flat (again, I like to put mine outdoors, but the guest bed will do in a pinch, or anyplace I can keep cat-free).

Patches that match are preferable.
Mend your linens. Underarms, collars, cuffs: they all get worn. Aprons get burned. Once you’ve gone over the garment to note the areas that need work, you can assemble your mending supplies: needle, thread, beeswax, and linen as close to the original as possible. Patch the holes neatly from the underside, making a small turned hem from the front. (This is not unlike needle-turned applique, but there are tutorials and guides. Turn or replace collars and cuffs. This is work I need to do on one of my shifts, along with restitching a neckline hem. It has taken several years to reach this point, but no matter the age of your clothes, it’s worth checking seams and hems and making repairs now.
Mend your stockings. These are often too expensive not to mend, plus, it’s period correct. There are tutorials for this, but the tools are simple: wool in weight similar to your stocking, a yarn needle, a darning egg, and patience. (Just use smaller yarn than shown here!) If you haven’t got a darning egg (and they’re pretty affordable, so…) a smooth, oval object will do (kitchen timer, small stone, a lime if you don’t poke it).
Living history laundry
Brush your outer garments. I have only laundered one of my gowns, and that was because it got very ashy and greasy. For the rest of my clothes, I brush off the dirt before I hang them up or pack them away. Greatcoats, regimentals, frock coats, breeches. Gowns, petticoats: all of them can benefit from a brushing. (This applies to your modern wool clothes, too.) There are a range of options, from brushes made in Sweden by the visually impaired to classic English options and German brushes for everything. Brush your hats, too! They get dirty, too. For all of these, if your garment is napped, brush with the nap, not against it.

Drunk Tailor cleaning shoes
Clean, grease, and reshape your shoes. You may covet one of these shoe brush kits, or you may have some standard brushes already– they were available even at the grocery store in my long-past childhood. Redecker brushes– and there is a brush for everything shoe-related on these seven pages— take a little finding but last. First, brush off the mud and dirt. Then, wipe the shoes down with a damp washcloth or towel. Let them air dry. Never put your leather shoes directly on a heat source! Then treat the leather. (Tutorial here.) You may want to use black ball, or a colorless polish, depending on your shoes. Drunk Tailor has made it, though not blogged about it, but you can start here if you really want to dive into this. When I’m done, I put shoe trees in my shoes, or stuff them with acid-free tissue paper so they keep their shape.

I was wondering, do you have any advice about mending underarm gussets? The stitching tore the fabric apart on the last shift I made and I had no idea how to solve that at all.
Ha oops, I didnt see Id already commented sorry…
That sounds like you need to a) replace the gusset entirely and possibly b) refit the gusset/shift sleeve. I’m familiar with underarm wear (as seen here, undergoing a mend https://kittycalash.com/2016/07/26/mendy-monday/) but having the stitching tear the fabric apart is a new one! I wonder, too, about the fabric– how tightly woven is it? (I am always more questions before an answer.) But I think, without knowing more, that I would start by replacing the gusset. Good luck!
I think it not being so tightly woven was likely the issue, but getting my hands on good shift linen here in the Netherlands has been a little difficult. It was linen from Merchant and Mills and it was stitched with polyester thread.
Step one would be to mend with linen thread. Merchant & Mills do carry it (https://merchantandmills.com/store/stationery/wenzel-thread-white/) but the thread sold by places in the US like Burnley & Trowbridge comes from Sweden. (I found it here in Finland, but I bet you can find it closer to you with a little digging, now that you have the brand name. https://www.lankava.fi/en/yarn/yarn-by-brand/bockens/ this is an okay weight for all-around hand sewing:https://www.lankava.fi/en/bockens-linen-lace-yarn-80-2/). I played around with the currency converters and this Burnley & Trowbridge linen would be a good value vs. the Merchant & Mills price https://www.burnleyandtrowbridge.com/6392.aspx though the real killer is –always– the shipping. (And don’t get me wrong: we are M&M fans in this household!) So, long/short: switching to a thread fiber that matches your fabric (linen) should help.
Thank you! I will check them out! I got some 65/3 linen from a belgian yarnshop, but it’s still a little too coarse. The shirt Im working on now and my current shift use linen from John Hanna, which seems to be a lot finer and denser, so Im curious to see how it wears even with the polyester thread I currently use. And yeah, the shipping is what kills me!
Do you have any advice on mending underarm gussets? On my last shift the stitching tore the fabric so I couldn’t simply restitch the seam and I had no idea what to do instead!
Under the heading Wash your Stockings you hit the nail on the head here at our house. A “cat free zone” is nearly impossible to find. The only room they’re not allowed in is full of all the stuff I don’t want them to sleep on, chew on, etc… We are down from 8 to 5 cats but it will be awhile before we’re back to a reasonable #. Love ’em but they also love my wool bedgowns for sleeping! very frustrating. 🙂