• Home
  • Completed Costumes/Impressions
  • Emma and Her Dresses
  • Free Patterns and Instructions

Kitty Calash

~ Confessions of a Known Bonnet-Wearer

Kitty Calash

Tag Archives: sewing

Back Bump: The Regency Silhouette

03 Tuesday Jun 2014

Posted by kittycalash in Clothing, History, Making Things, Reenacting, Research

≈ 3 Comments

Tags

18th century clothes, 18th century clothing, authenticity, Costume, dress, fashion, fashion plates, history, living history, Making Things, Research, sewing

Ah! Quelle antiquité!!! Oh! Quelle folie que la nouveauté ... Engraving, 1797. 1892,0714.755 British Museuem

Ah! Quelle antiquité!!! Oh! Quelle folie que la nouveauté … Engraving, 1797. 1892,0714.755 British Museum

Regency, Federal, Early Republic:  we use these terms to cover (roughly) the period from 1790-1820, though technically the Regency period would mean only 1811-1820, when George IV served as Prince Regent, ruling for his incapacitated father, George III. In the United States, “Regency Costuming” is a bit of misnomer if you’re copying early American gowns, but it does serve as a handy short-hand we all tend to understand.

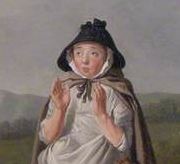
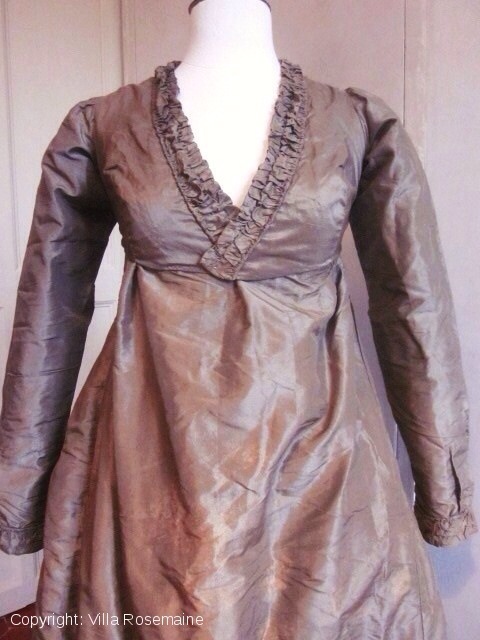
Grossly, the principles of dress are rooted in neo-classicism and republicanism rising from the American and French Revolutions. Specifically, we see a turning away from the heavily-boned, panniered, and formal gown styles to the looser, short-stayed, flowing, simpler gowns.  The transition is summed up for me in this satirical print.

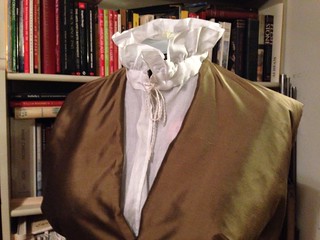
So, you’re no longer side-to-side wide, baby: you gotta have back.

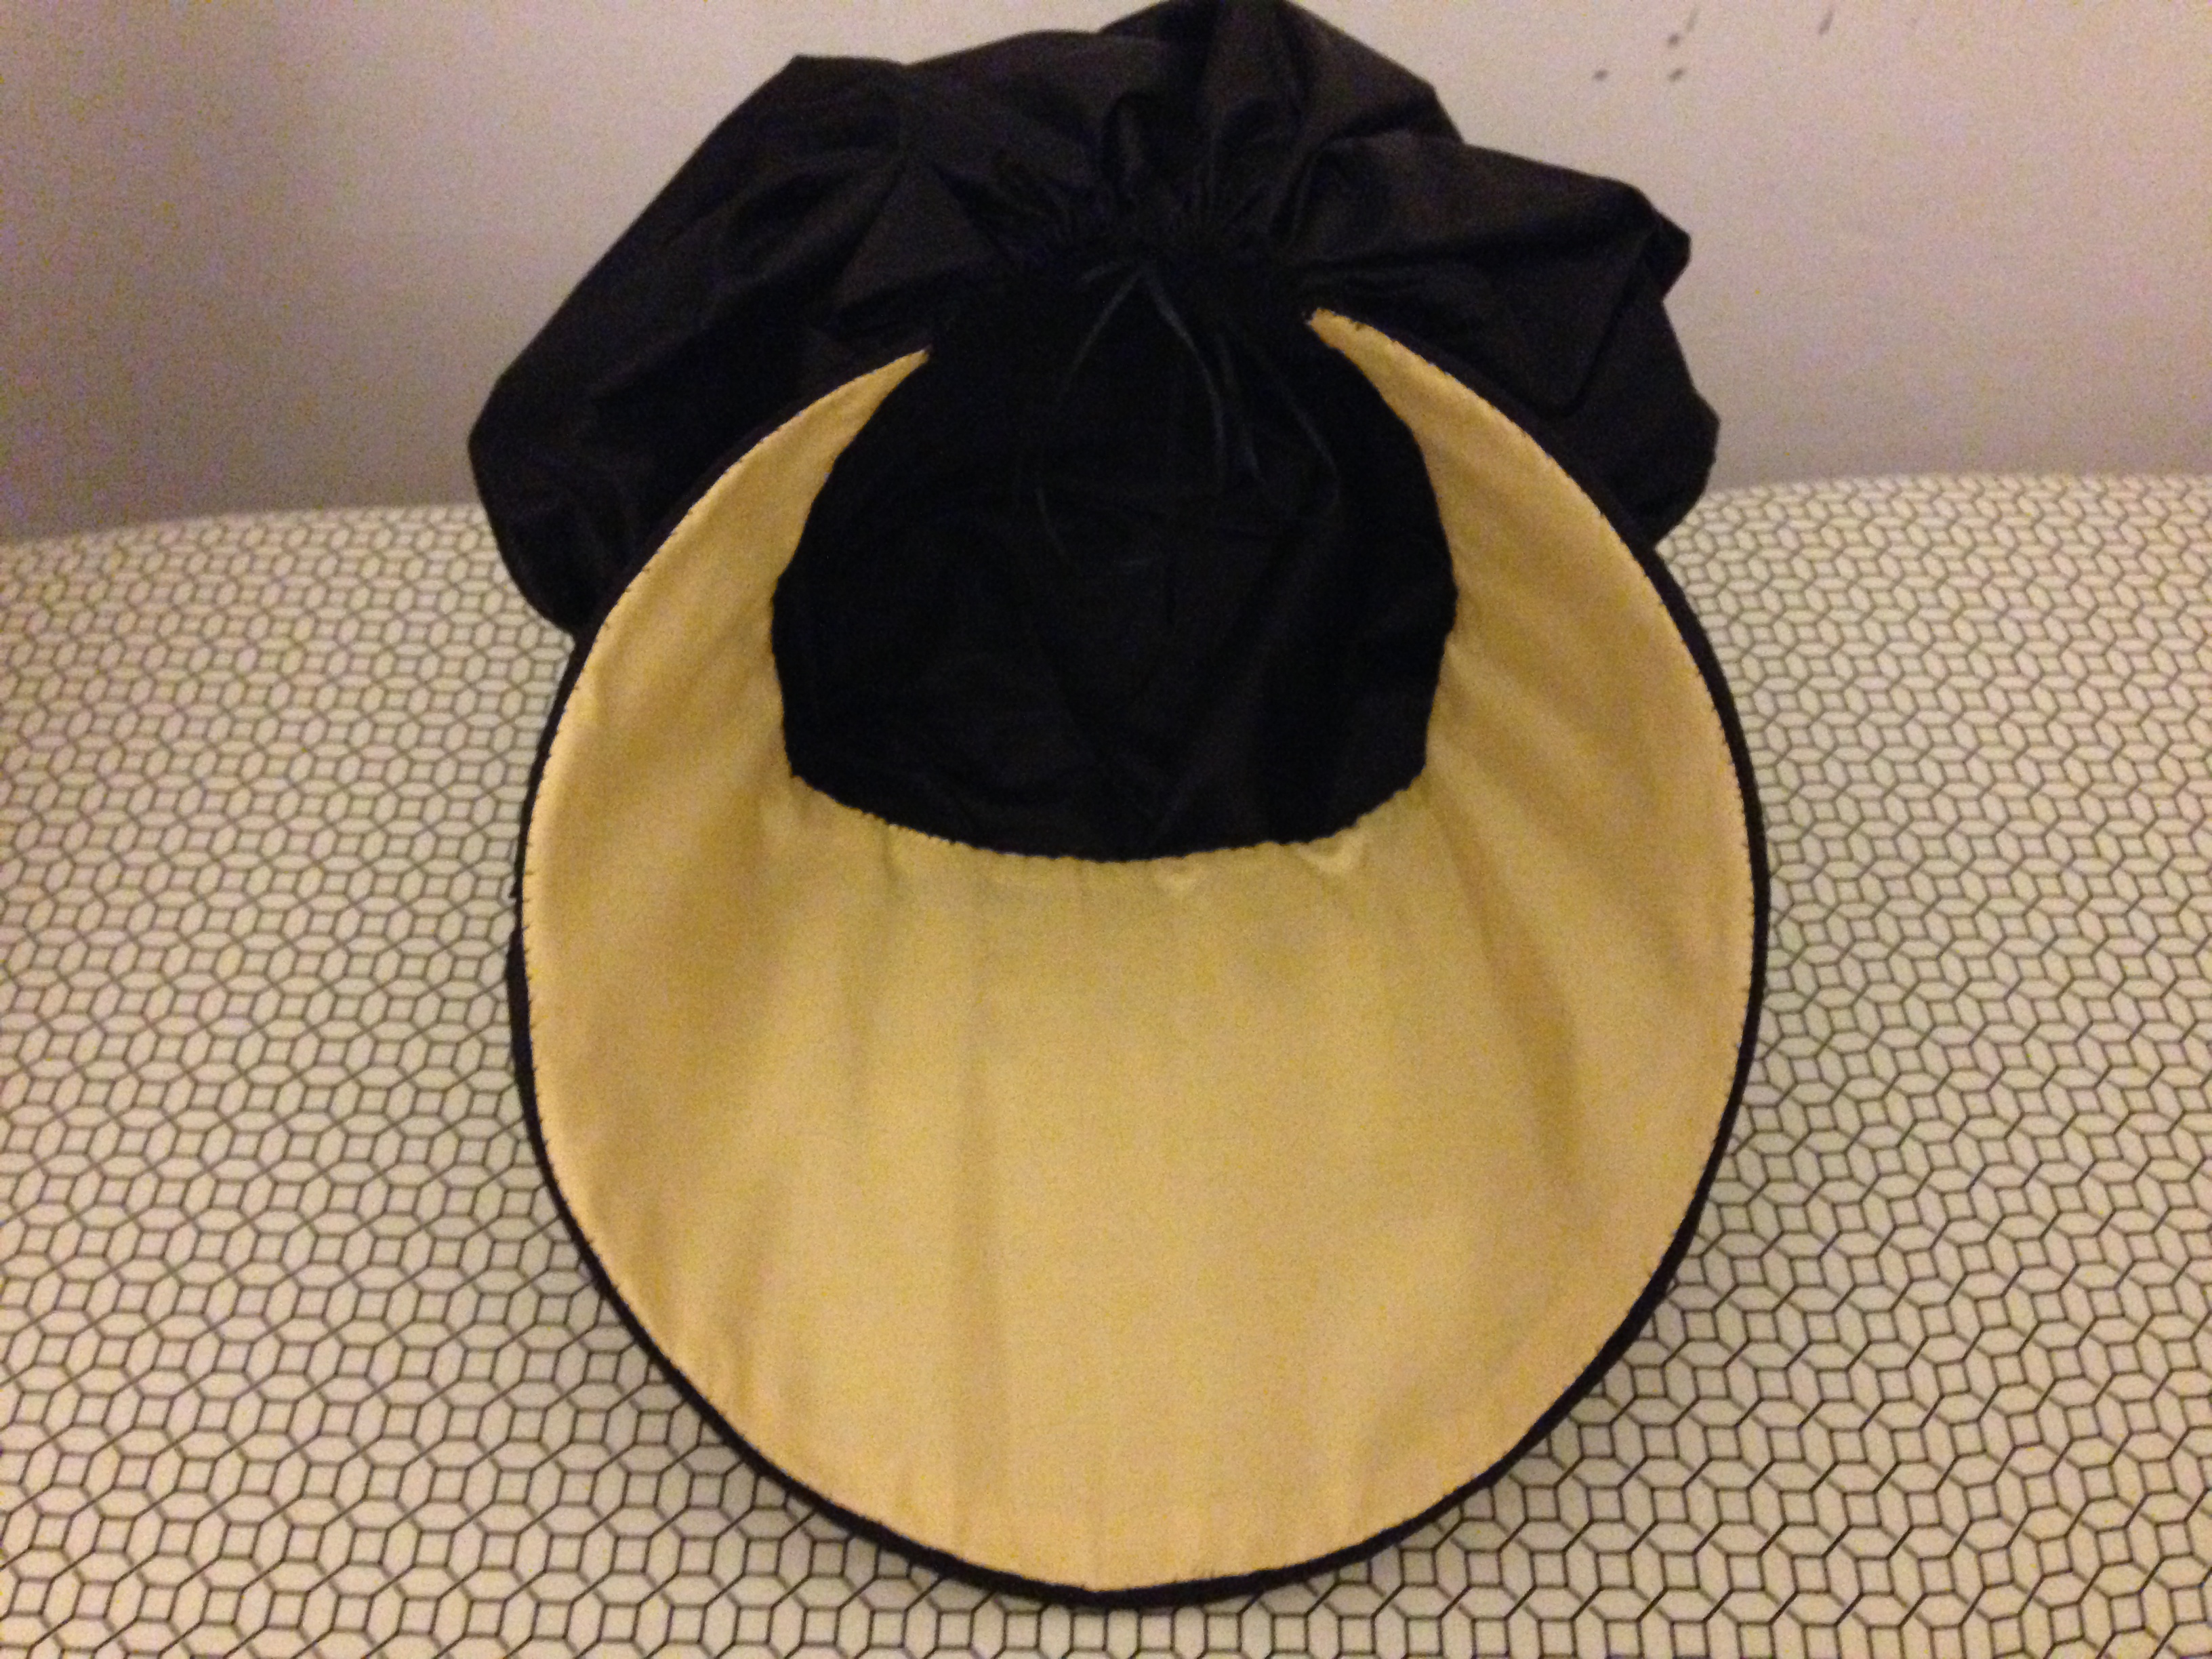
How do you get back? There are a couple of perfectly authentic tricks that do not require you to stuff a cat into the back of your dress, though you can do that if you want. The combination I have found to work is two-part: a small, crescent-shaped pad, and the method of pleating. How you deploy the pad and the pleats will give you the silhouette you desire.

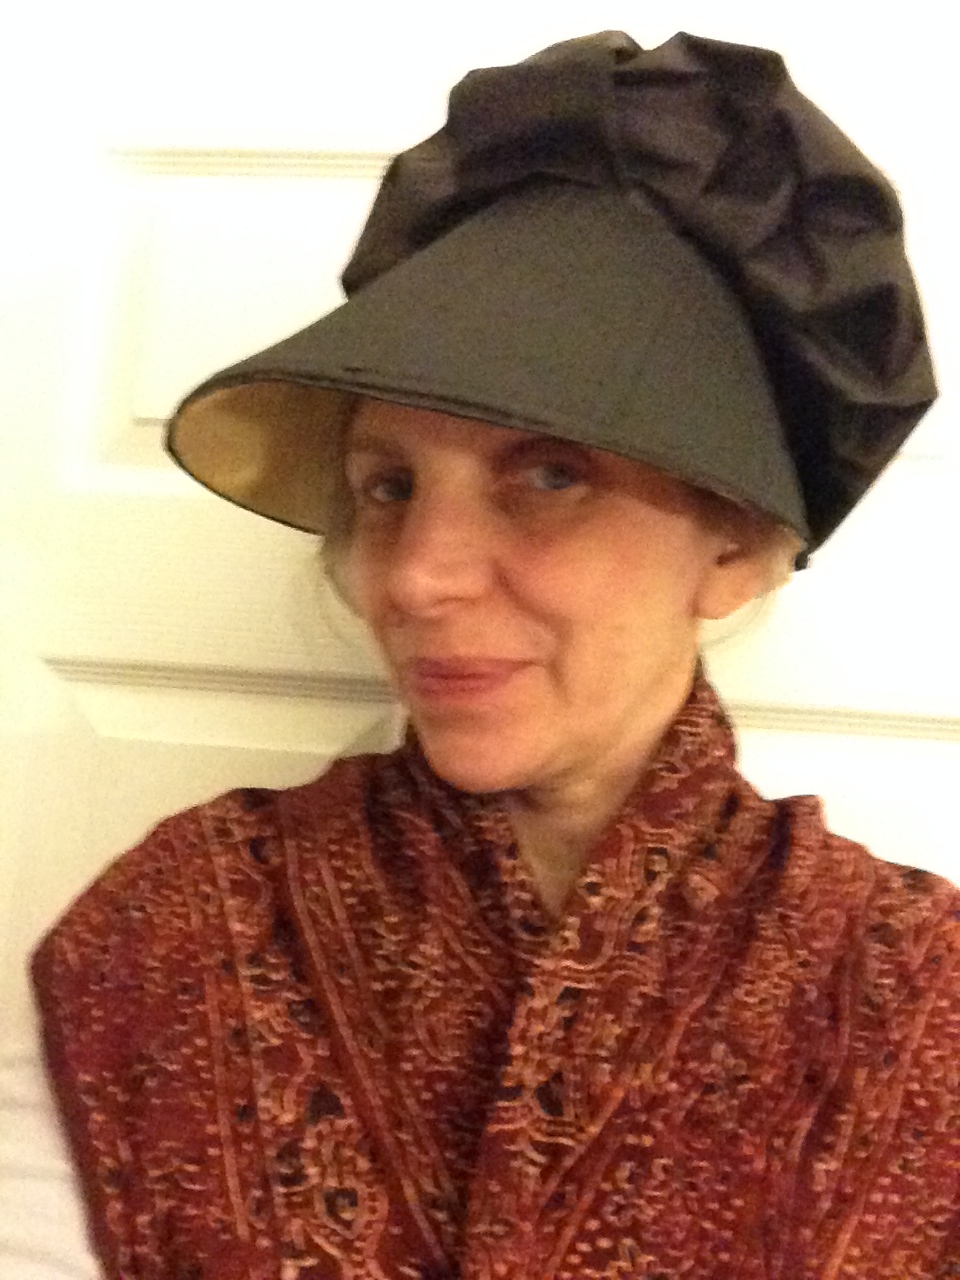
First, though: which silhouette? In really the 1790s, the silhouette is rounder than you might think. It really is a round gown.

Ann Frankland Lewis, 1793. LACMA
The Frail Sisters, 1794

To get that look, I use a small rump pad, bustle pad, or bum roll (call it what you like), which is stitched to the inside of my petticoat.

Pad from the inside
Pad from the inside
Pad from the outside

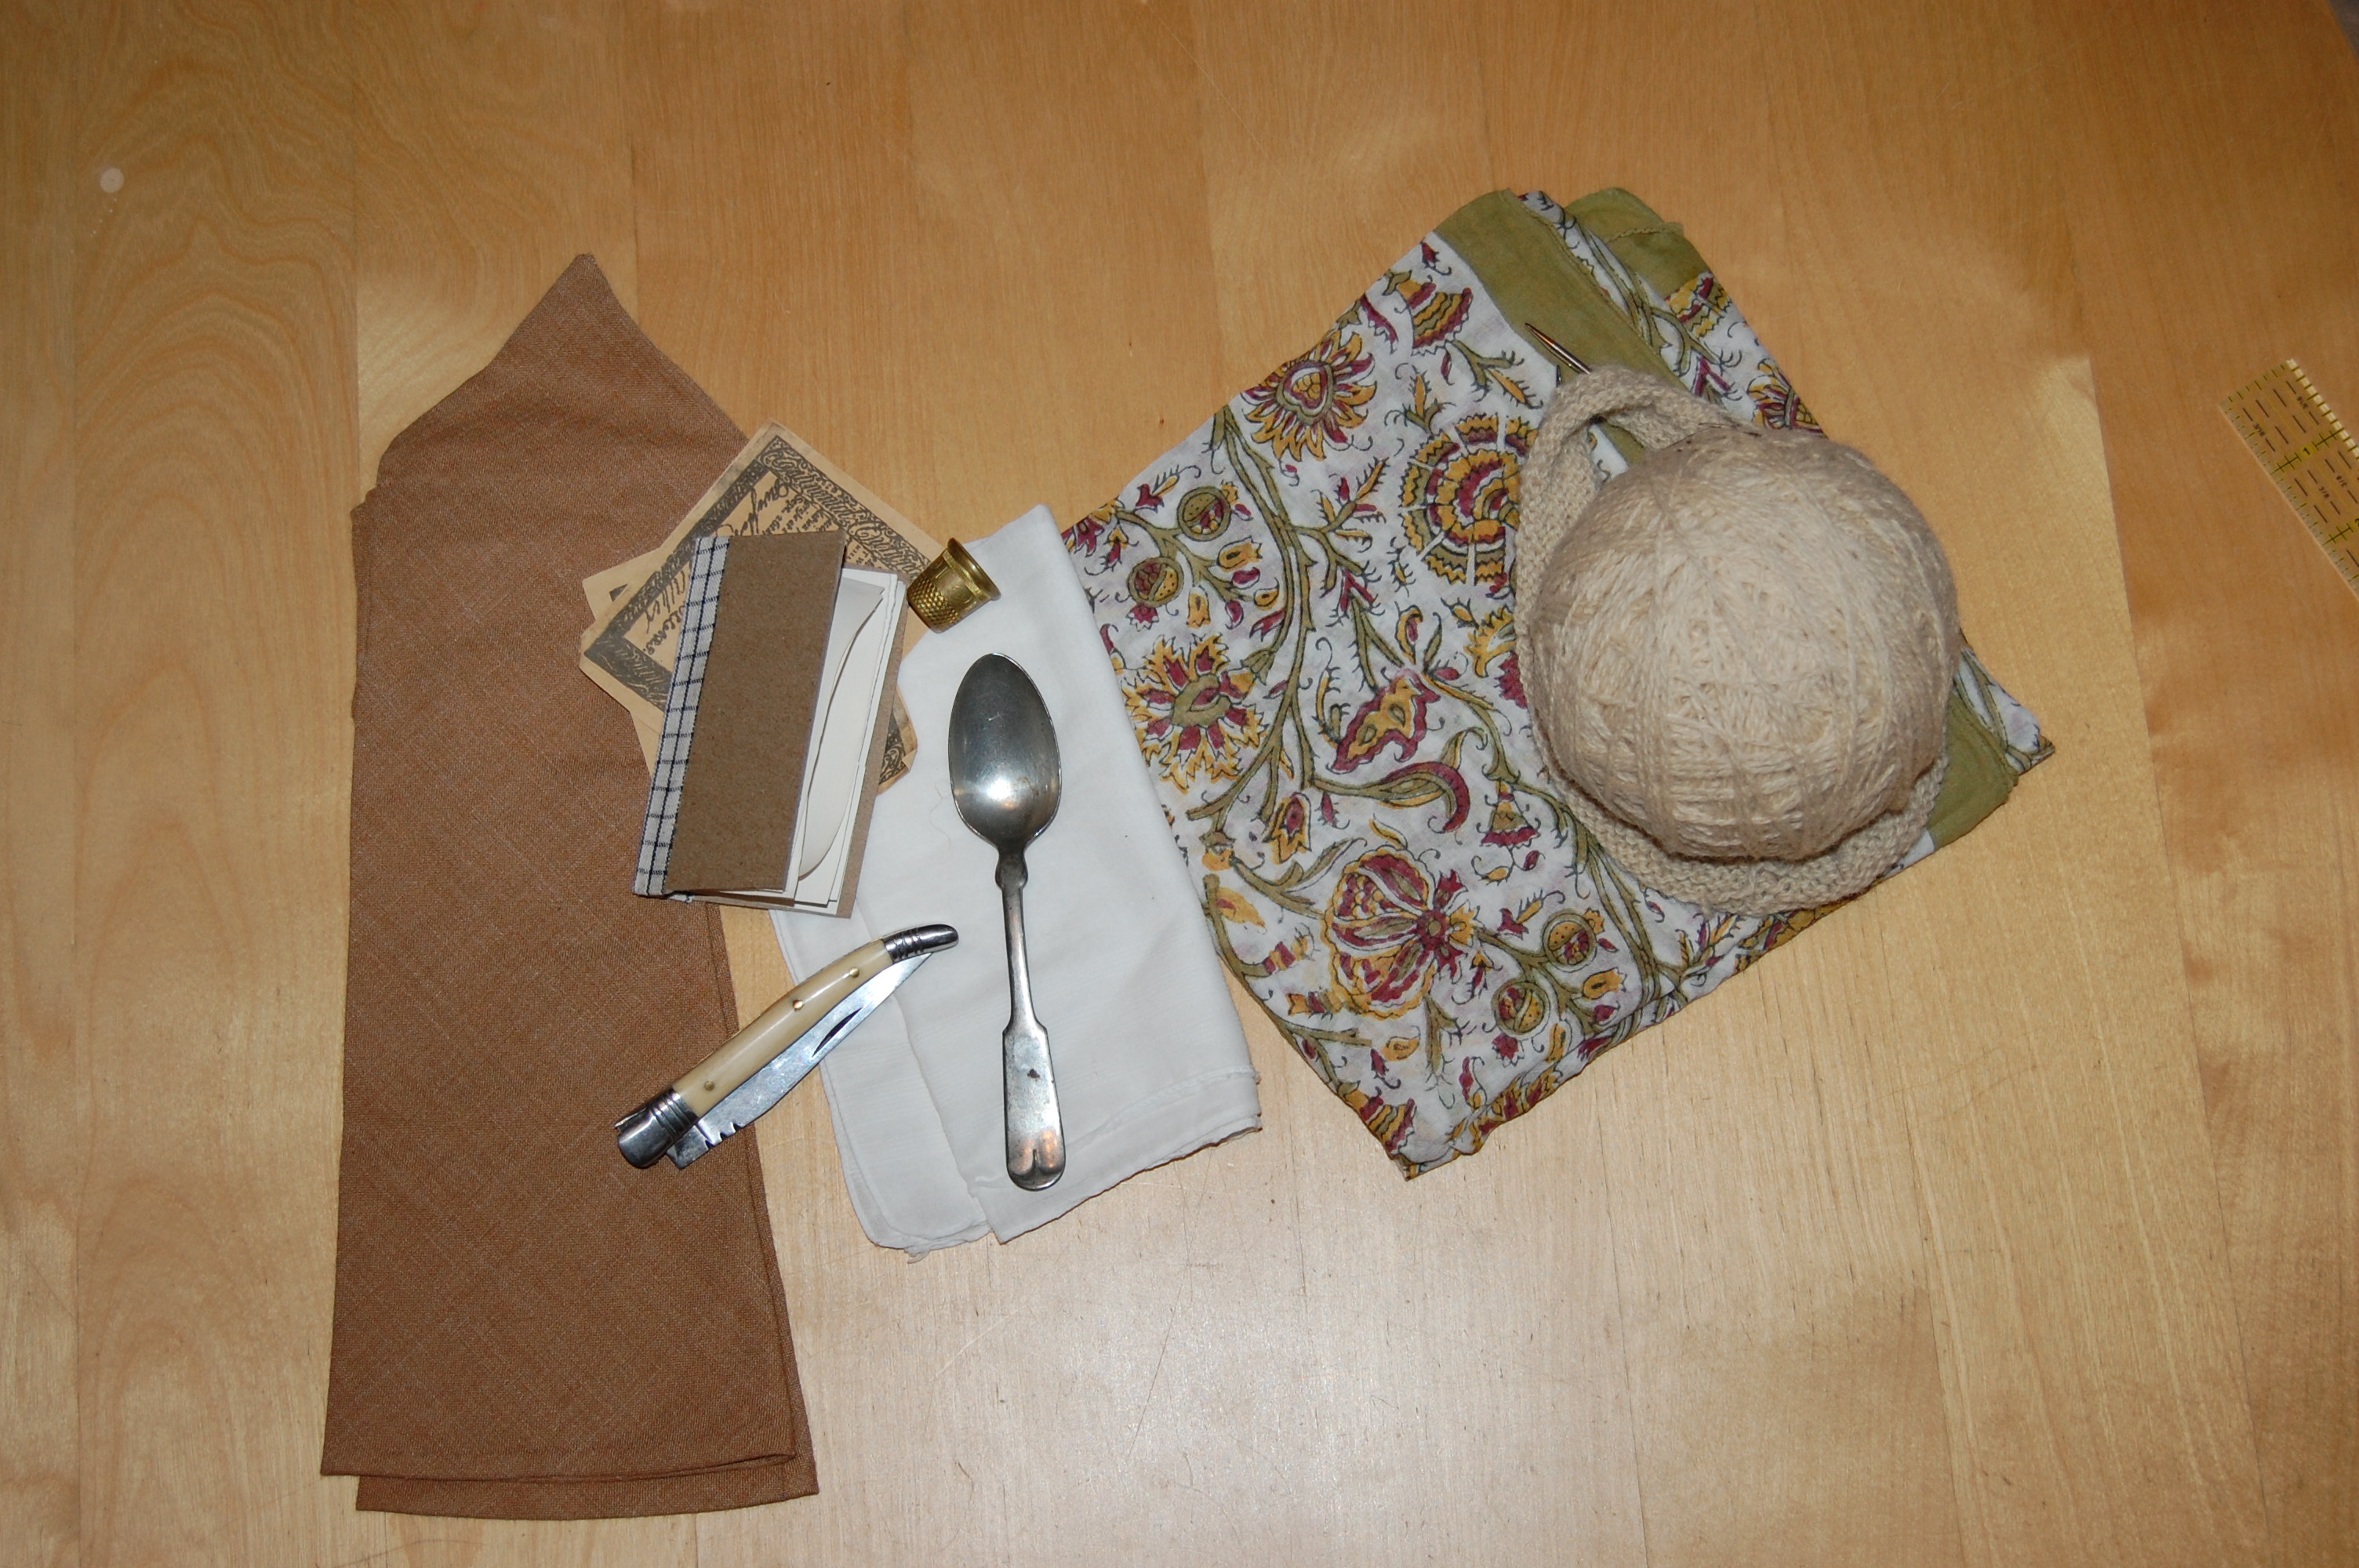
That’s the white IKEA curtain petticoat I made during the extended snow days of last year, and which I have worn with the red curtain-along open robe and under the petticoat and open robe for What Cheer Day. The pad is the same natural light-weight linen I use for a many gown linings, filled with bamboo stuffing. If I’d had wool on hand in the small hours of the morning I made this pad, I would have used it, but all I had was bamboo in the rush to finish up and have something to wear for a photo shoot.

The other key factors are pleating styles and fabric weight. Pleats can add lift, but in general, the lighter the fabric, the more lift a small pad will give you.

Double and triple box pleats, exterior view
Double and triple box pleats, interior view

1780_1790
I’m particularly fond of the pleats used for the gown shown on page 75 of Nancy Bradfield’s Costume in Detail. I’ve used this as a guide several times, and I am very pleased with the results. They do vary, of course, depending on fabric weight, fibre, and length. Stiffer cottons, like the Waverly Felicity of the curtain-along gown, will make a round shape; tropical weight wool does fairly well, also, but the most amazing 1790s rendition I have achieved to date is the light-weight India print cotton short gown.

On Cassandra
On Cassandra
On me
On me

Now that’s 1790s back. The bustle-like shape surprised (OK, shocked) me, but on the whole, I think I’m pleased. So there you are: pad, petticoat and pleats: that’s how you get back.

Share this:

  • Share on Facebook (Opens in new window) Facebook
  • Share on Pinterest (Opens in new window) Pinterest
  • Email a link to a friend (Opens in new window) Email
  • Share on X (Opens in new window) X
Like Loading...

A Whale-Safe Bonnet

23 Friday May 2014

Posted by kittycalash in Clothing, History, Living History, Making Things, Reenacting, Research

≈ 6 Comments

Tags

18th century, 18th century clothing, bonnets, common dress, common people, engravings, fashion, Marquis of Grandby, millinery, Research, Revolutionary War, sewing, style

Complete with my interpretation of "Hat Face"

Complete with my interpretation of “Hat Face”

As promised, my interpretation of the ribbed bonnet in the 1789 engraving. There are a few problems with this beyond the model. (Which is not to say that I don’t like this bonnet– I do!)

I used the Kannik’s Korner bonnet pattern (view F, I think) as the basis for this because I already had a brim, lining, and caul cut and in a drawer. Given my current medicated state, using something pre-cut seemed advisable. That means I didn’t play with the brim to create the line of the Williamsburg bonnet, or the curve of the brim in the “Fortune Teller” engraving.

Detail, The Marquis of Grandby

Detail, The Marquis of Grandby

Is this style acceptable for the period I typically interpret (1775-1783)? Well… there are other examples of the lampshade-style bonnet, as in the Edward Penny painting of the Marquis of Granby. This painting is dated “after 1765” so there’s some room for interpretation there…too much room. But if that’s 1765-1770, and the “Fortune Teller” is 1789, I think we have comfortably covered the 1775-1783 time frame, even if it is a bit like a queen-sized blanket on a twin bed.

Front view: more lamp-shade like.

Front view: more lamp-shade like.

As you can see, the bonnet does have some lamp-shade-like tendencies on my head, which I consider a benefit. I like the way the ribs are visible, even if I remain unconvinced by the caning. I think it’s a little too wide, and lacks resiliency, though to be honest, I have only felt baleen at the New Bedford Whaling Museum, where there is a large sample on the second floor.

To compensate for the disappointing cane in the brim, I slipped a piece of millinery wire into the pocket underneath the cane. The layers in the brim are:

  • black taffeta
  • horsehair canvas
  • linen buckram
  • yellow taffeta

The channels are all hand-sewn, and then the cane was slipped in. I stitched the black taffeta caul to the first three layers, and then lapped the yellow taffeta over the raw edges and stitched it down to finish the brim/caul seam.

No, I didn’t take any in-process pictures…probably because this took considerable snake-eyed concentration last weekend. IMG_1477 IMG_1476

Usually, I line the cauls of my bonnets, but through shear laziness or distraction, I opted not to this time, and I think I’ll leave it this way for a while. You will also note that I have not trimmed this: I have some black silk ribbon coming, and I may try that. I don’t have enough black taffeta left to cut self-fabric ties, and there do seem to be some plain examples. A plainer, lamp-shade-like bonnet may be just the ticket for Bridget.

What would I do differently? Next time I would definitely play with the brim shape using a paper template. I’d like a lower, curvier, brim. Once I had the shape worked out in paper, I would use that as a template to cut the taffeta and horsehair or light buckram layers.

The Edenton Tea Party

The Edenton Tea Party

I’d also try zip ties. I know: not period correct! But short of risking federal prosecution resulting from a trip to New Bedford with some shears, I’m not sure that anything other than plastic will have the resiliency and spring that baleen has, and that made these bonnets so special. I thought of them while making this bonnet, but I think Mr S used them all at work in the past two months. A Facebook friend has been thinking of zip ties, though, and has a hankering for one of these bonnets. I can’t say that I blame her– and honestly, I think I might join her.

Share this:

  • Share on Facebook (Opens in new window) Facebook
  • Share on Pinterest (Opens in new window) Pinterest
  • Email a link to a friend (Opens in new window) Email
  • Share on X (Opens in new window) X
Like Loading...

Pockets 2.0

09 Wednesday Apr 2014

Posted by kittycalash in Clothing, History, Living History, Making Things, Reenacting

≈ 2 Comments

Tags

18th century clothes, 18th century clothing, common dress, common people, Events, pockets, sewing

Pockets the First

Pockets the First

At left, Pockets 1.0 or perhaps beta. The far left pocket, when worn alone, was definitely beta. Then came the striped pocket, and then sewing them both to the tape. That helped– and I use the small pocket for things like wallet, phone, car keys and Band-aids, and the larger pocket for interpretive things. I try to follow the Under the Redcoat kind of model: one pocket is modern, one is historical; that way I don’t pull the car keys out along with the knitting, or am at least less likely to.

Too much stuff.

Too much stuff.

Here’s the stuff I carry in my purse today, actually a backpack-purse, downsized from a messenger bag. That’s a lot of stuff. But if you compare the list to the list of what might have been in an 18th century pocket, you’ll find a lot of similarities.

There’s a pen and a pencil, wallet and checkbook, granola bar, chewing gum, change purse, keys, more keys, and phone. All of those are just modern analogues for paper money, coins, orange or apple, candy, book and notebook, since the phone can fill in for so many things– notebook, money, keys, pen, book…

DSC_0174

The historical assortment is much more attractive, in part because I don’t use these things every day, and they don’t get tangled up and worn in a bag. Mitts, kerchief, hankie, my husband’s pay, knife, thimble, spoon, and knitting (I may never get a pair of stockings knit): these are all accurate to carry, though the knitting needles will have to change before that’s taken out in public.

DSC_0173

All that, or some combination of like things, will go into one pocket, and the modern mess into the other. I fear these new pockets are, for now, too nice for Bridget. I may just stick with my old, mis-matched ones for now.

Share this:

  • Share on Facebook (Opens in new window) Facebook
  • Share on Pinterest (Opens in new window) Pinterest
  • Email a link to a friend (Opens in new window) Email
  • Share on X (Opens in new window) X
Like Loading...

Mischief Monday

31 Monday Mar 2014

Posted by kittycalash in Events, Living History, personal, Reenacting

≈ Comments Off on Mischief Monday

Tags

10th Massachusetts, 18th century clothes, 18th century clothing, Costume, dress, fashion, George Washington, Grand Ball, living history, Reenacting, sewing, style

The gossip begins...
The gossip begins…
I don't believe a word of it.
I don’t believe a word of it.
No, really?
No, really?
Overcome, at last, by dramatic but hilarious news.

Photos from the George Washington Birth Night Ball are finally available, and presented here for your entertainment. You can read a more comprehensive overview of the event here, on Sew 18th Century’s blog. Bonus: extra pictures!

Share this:

  • Share on Facebook (Opens in new window) Facebook
  • Share on Pinterest (Opens in new window) Pinterest
  • Email a link to a friend (Opens in new window) Email
  • Share on X (Opens in new window) X
Like Loading...

Criss Cross

05 Wednesday Mar 2014

Posted by kittycalash in Clothing, Living History, Museums

≈ Comments Off on Criss Cross

Tags

Clothing, Costume, fashion, Making Things, museum collections, Museums, Newport, Newport Historical Society, patterns, Quaker dress, Quakers, Reenacting, Research, Rhode Island history, sewing

Dolly Eyland, by Alexander Keith, 1808. (c) The New Art Gallery Walsall; Supplied by The Public Catalogue Foundation

Dolly Eyland, by Alexander Keith, 1808. (c) The New Art Gallery Walsall; Supplied by The Public Catalogue Foundation

I like Dolly. The colors, the textures, the style of her gown, shawl and cap all please me. She’s rocking some serious class for a woman headed towards a certain age. And she’s wearing a cross-front gown, which is what I settled on for my Quaker costume. 

Taffeta dress, ca.1800-1810, Originally found on Villa Rosemaine site, where it does not appear now.

The trouble with making a gown based on an artistic sketch in a book is that you don’t have the most complete sense of what that garment looks like, or how it goes together.

Not to worry, I went ahead anyway, because this is as close to Everest as I will ever get.

But I wanted comparable garments to help guide me. Ages ago I found the gown at left on a French costume site. That’s helpful, in that it explains the trickiness of assembling and wearing this style of garment. Three pieces coming together in the front may be one piece too many. 

In making up my pattern, I used the pattern for the Spencer as a starting place because I knew that the set of the sleeves and arm scye were what I wanted. No reason to re-invent that process!

That left me with the luxury of concentrating on the neckline.

That took a few goes with the tracing paper and muslin:  I did lose count after a while. There may have been tears, there definitely was swearing. Mr S at one point made jokes about this process appearing on the Discovery Channel’s “How it’s Made” as “the Quaker dress.” He’s really very patient, and I do understand the selective deafness he’s had to develop as a defense against the dark arts of sewing historic clothing.

Thank you, Cassidy, for the chemisette!

Eventually, I had a decent lining and even some silk bodice fronts. I fiddled with the fronts, and settled on gathers instead of pleats, but couldn’t quite figure out where the casing went. Some days I can process drawings into objects, some days I can’t. I’d just about reached the point of cutting it all up into the gown I always make when I discovered that the excellent women of the 19th US had patterned the gown from the drawing, too. (If you don’t already use this site, I highly recommend it. Excellent work.) Those pattern pieces look like my pattern pieces, so I decided it was worth carrying on with what I have.

Share this:

  • Share on Facebook (Opens in new window) Facebook
  • Share on Pinterest (Opens in new window) Pinterest
  • Email a link to a friend (Opens in new window) Email
  • Share on X (Opens in new window) X
Like Loading...
← Older posts
Newer posts →

Archives

wordpress statistics

Creative Commons License
Kitty Calash blog by Kirsten Hammerstrom is licensed under a Creative Commons Attribution-NonCommercial-ShareAlike 4.0 International License.

Website Built with WordPress.com.

  • Subscribe Subscribed
    • Kitty Calash
    • Join 621 other subscribers
    • Already have a WordPress.com account? Log in now.
    • Kitty Calash
    • Subscribe Subscribed
    • Sign up
    • Log in
    • Report this content
    • View site in Reader
    • Manage subscriptions
    • Collapse this bar
 

Loading Comments...
 

    %d